Make Your Own Joystick Series
Tutorial #5: Connecting the wires
In this tutorial, we will be making a PS3 compatible arcade joystick. We will feature how to make a XBOX 360 compatible arcade joystick in a future tutorial. For now, we will need to install a Cthulhu board for the PS3.
Before installing, you should plan where you will install the board. Drill a hole for the usb port of the board at the back of the box.


Cut two pieces of wood and glue it on the base of the front panel. This will serve as the base of where the Cthulhu board will be mounted. Attach the board onto the wood pieces with two screws.


This time, we will install Sanwa buttons and a Sanwa joystick to our box.


We now arrive at the most important part of our tutorial: actually connecting the wires. All the tools you need for this part are a multimeter, a wire stripper, a long-nose plier, and a slotted screwdriver. Please note that you do not need to solder anything! The parts you'll need are a cable for the Sanwa LF-TP-8YT (we carry this in our parts section), AWG-22 wires, and .110" quick connects (again please see our parts section).


You will need to prepare 11 pieces of 11" AWG-22 wires for the buttons. Clip off both ends of the wires and attach the .110 quick connects on one end of the wires with your long-nose plier.


Next, prepare 11 pieces of 4" AWG-22 wires for grounding wires. Clip both ends of the wires as before, and attach .110 quick connects on one end. Then join the ends together and secure with the plier.

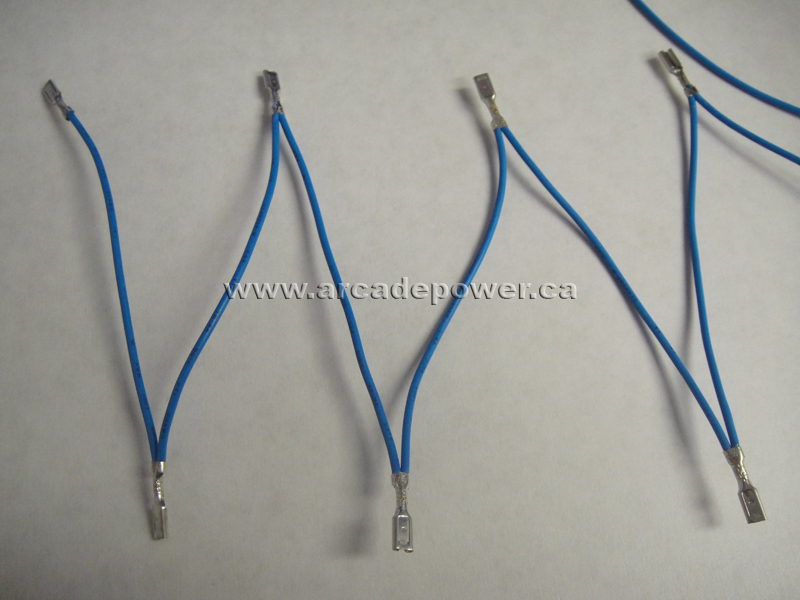

We will now use the multimeter to see if the quick connects are properly attached to the wires. Set the multimeter to X1 OHM section and touch both ends of the wires with the multimeter's probes. If the multimeter indicates that there is zero resistance, then the wire is fine. Otherwise, you need to reattach the quick connects and test again. This is a very important procedure--if you've done this procedure and later find out that the buttons are not functioning, then the wires are not the problem. The problem lies with the Cthulhu board. If you skip this step, you may waste valuable time finding out what the problem is.


After preparing and testing all the wires, you are ready to connect the wires for the joystick box. You will need the Cthulhu diagram below to attach the wires.


Label all the buttons and joystick pin-outs.


If you haven't already, attach the Cthulhu board onto the box.


Plug in the cable for the Sanwa LF-TP-8YT and connect the ends to the Cthulhu board according to the diagram above.

Attach all grounding wires onto all the buttons and the Cthulhu board.


Finally, connect the remaining wires from the buttons to the Cthulhu board according to the diagram.

Screw the base back to the bottom and attach 4 rubber feet onto the corners of the base.

Congratulations! Your arcade joystick box is finally complete! Now you can plug in your arcade joystick to your PS3 with the USB A-to-B cable (parts) and test your new toy!